Wednesday, January 30, 2019

Personal Journal Setup

I'd like to share with you how I have set up my personal journal so that you have an example of journaling. By no means should you see this post as a how-to, tutorial, or instructional guide. I just want to show you what works for me, in the hopes that I'll inspire you to think about how you can apply these ideas to your own life.

For me, there were six areas of my personal life that I wanted to journal, either to keep forward momentum, or make some significant changes:
  1. Organization and planning, specifically, I wanted to be more consistent in keeping a regular schedule and routine, so that I am reliable and less stressed about unpredictability;
  2. Recreation and hobbies, specifically, that I wanted to read more regularly and finish craft projects I've started;
  3. Self-care and social life, specifically, that I want to better manage my mental health and happiness, and be a better friend;
  4. Fitness, specifically, I want to become more physically active in terms of just "regular" activity as well as strength training;
  5. Nutrition, specifically that I wanted to lose a little bit of weight and improve my health by eating healthier; and
  6. Inspiration and motivation, specifically that I want to keep moving forward when I don't feel like it.
For each of these areas, I have made the following journal "spreads," or pages that accomplish a specific purpose: trackers, for example, record behavior; lists (of tasks, things you need, things you want, whatever); calendars; and, less so in my case but ubiquitous in social media, pages simply for the sole purpose of displaying or improving artistic ability.

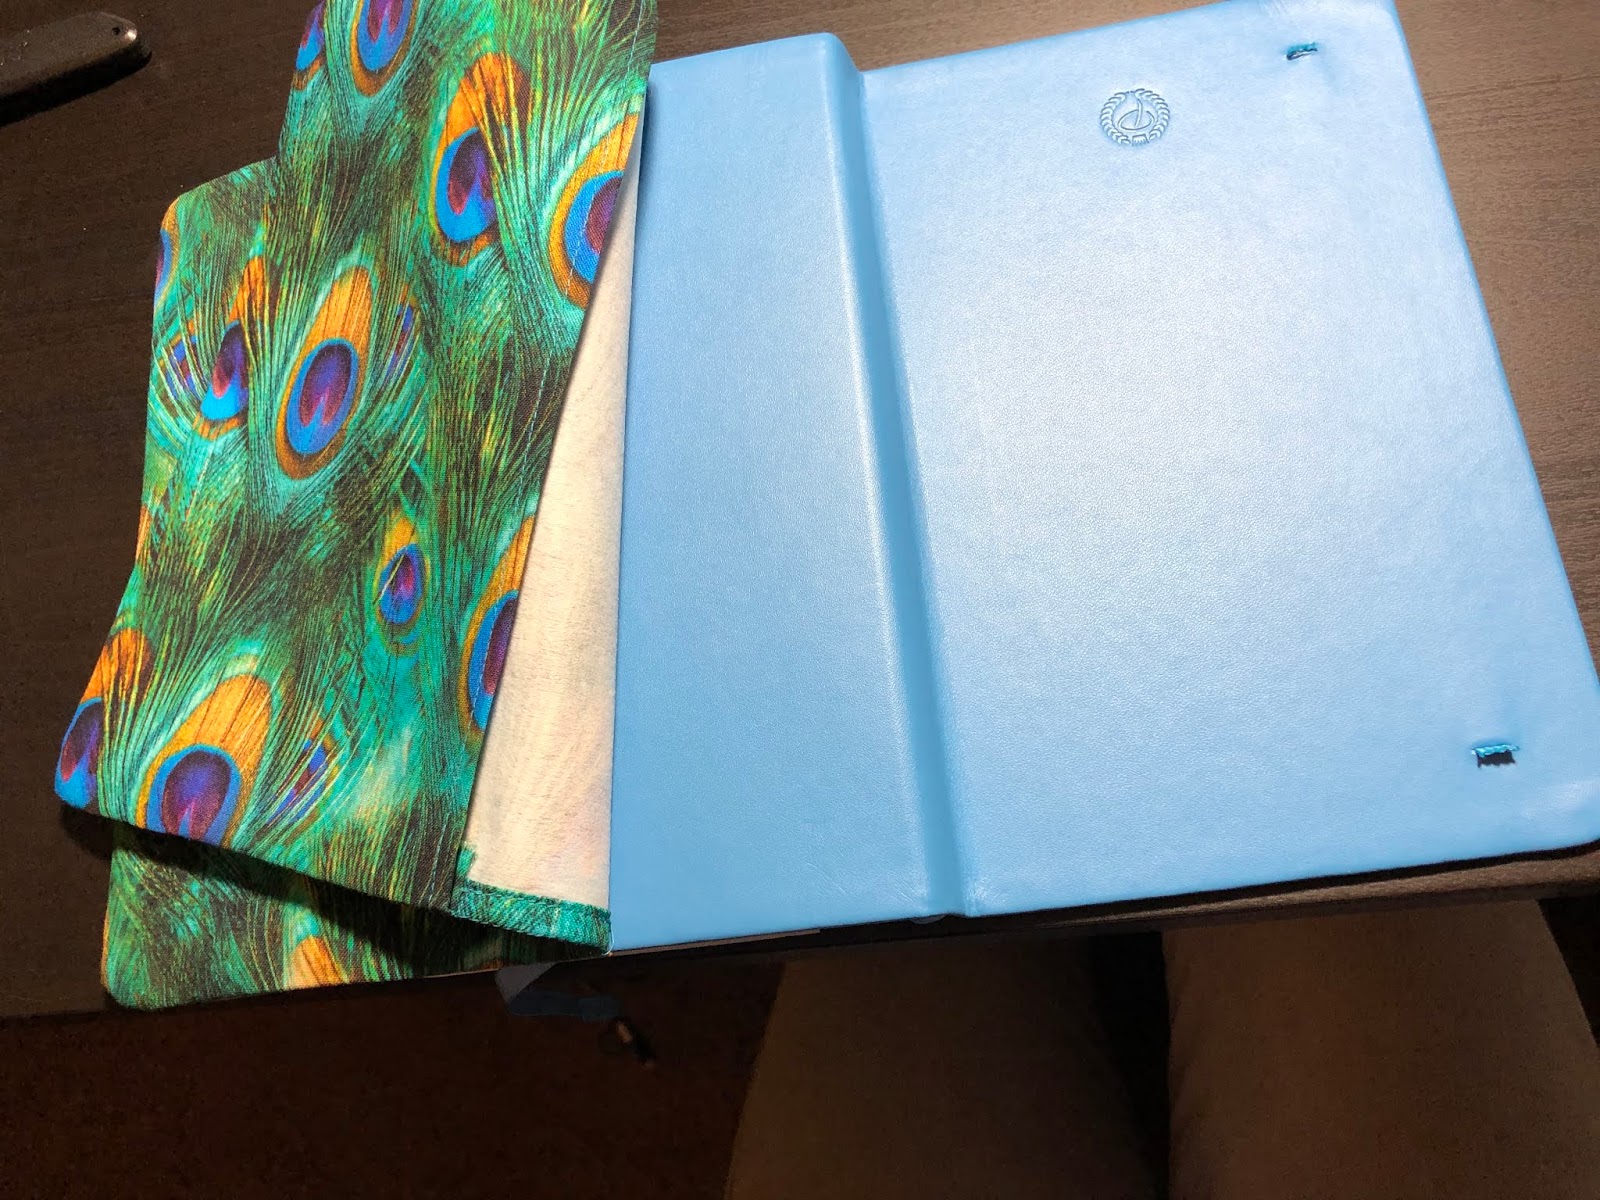
I will add that I keep my personal journal in a ring binder. There are several reasons for this, not the least of which is that I had no idea what I was doing when I first started and wanted to have the ability to add and remove pages until I knew more than I did. Also, relevantly, I didn't buy this binder (at least any time recently) - I found it while sorting through some old office supplies, and it had an unused planner refill that was dated over ten years old. I liked the size - it's an A5/half letter size, so it's small enough to fit in my purse, and conveniently I can make pages simply by cutting letter-sized paper in half (although I do have to individually punch 7 holes in each page).

I'll get into my recommendations for supplies in a later post, but I will say that I love the binder format much more than the bound-book format, and I highly recommend it if you're just starting out.

Also, please note that I have, very generally, three types of spreads (since I do not use daily spreads): weekly, monthly, and annual, based on the amount of time each page (or two pages) covers.

I am working on getting a printable version of each of the trackers I use for you to try and modify as you see fit; this post has been drafted in advance, so some of these may have been up for a while and others may be posted following the publication of this blog post.

Index page: The very first page of my journal has a list of each of the following sections and each of the spreads in that section.  I made this after I had nailed down all of the sections and pages, and have redrafted it a second time. I keep my index page simplified to sections only, simply because I constantly change my binder pages.

Organization and Planning
  1. Weekly plan: I prepare this weekly spread based on a template containing a box for each day of the week & tasks I want to accomplish those days, as well as a box each for meals, chores, and errands.
  2. Chores: I prepare this monthly spread to track daily, weekly, and monthly chores. I must admit that I have not been doing a good job keeping up with this spread. I am already pretty good about housework, but the particular tasks I put into this spread did not align with what I like done about my house.
  3. Impulse spending: I am trying to be better about saving money in 2019. As a result, this tracker has a list of every penny I spend that isn't on bills or groceries, the date/time/purpose/amount spent. The idea is to dissuade myself from spending money on things that are simply wants, not needs, knowing that I'll have to write it down later.
  4. Grocery Store Spending Log: I'm trying to spend less at restaurants and budget better in 2019, so I keep track of how often I go to the grocery store and how much I spend. I'm also trying to waste less food, which this is designed to help (by keeping track of how much and how often I spend on food).
  5. Budget & Bills: again, another financial planning tracker. This spread is to make sure I pay my bills on time and keep track of how much I've spent.  I have a list of each recurring monthly bill, how much I paid, and the day I paid it on. I have done this with an Excel spreadsheet for several years, and it works wonders to keep me from getting a utility cut off because I forgot to pay it! (Yes, that happened to me about two or three times a year before I kept track, when I was in college.)  This is not only a checklist but also a spending tracker.
  6. Savings tracker: in 2019, I am trying to save up for a couple of personal expenditures and also to improve my financial stability. I found a mason jar outline, duplicated it, and drew dashed lines representing $500 increments to my ultimate goal of $5,000 saved.  I'll color it in at the end of each month at the beginning of a new pay/bill period.
Recreation and hobbies:
  1. Reading list: I want to read more in 2019.  This tracker lists the title and author of a book I'm reading, the date I started and finished, and has a progress bar.
  2. To-read list: I would like to finish 12 fiction and 12 nonfiction books in 2019.  This page currently has a list (although I'm working on a more artistic layout) with the books I'd like to read. I don't want to get to the beginning of a month and not have any ideas about what to read next!
  3. Movies: more times than I can count, I have thought that I need to get a decent hard-copy movie collection going. This is a "wish list" of those movies so that I know what to grab when I find myself at the used movie store.
  4. Craft inventories (upcoming): in addition to journaling, I sew, knit, crochet, and embroider. I'm pretty organized, but that doesn't mean that I know exactly what supplies I have at home. At some point, I'm hoping to sit down and make an inventory of all of my yarn, fabric, embroidery thread, and sewing notions, so that I can see at a glance what I have, and can avoid buying duplicates.
  5. Craft project master list: I love showering my family in homemade gifts, but I consistently have had two problems since I've started doing this: not keeping up with the ideas for gifts I can make for family, and not finishing them.  This is a list of items I'd like to make for family as well as for myself.
  6. Craft project sheet: as I said above, I'm not great about finishing craft projects. This template breaks down major (more than one day of work) projects into bite-sized pieces so that I can motivate myself to finish, as well as keep track of those major project successes!
Self-care and Social Life:
  1. Confidence and social skills tracker: I'm trying to be a better friend, sister/daughter, and partner in 2019, after some pretty significant shake-ups in my life in 2018. This is a monthly tracker with 8 key areas where I think I can improve my social skills, based on criticism that has come from both positive and negative sources. This is an exception to my general rule for goal-keeping; it's a bit specific, but it isn't really measurable other than self-assessment, which is fine with me.
  2. Vitamins, supplements, and medications: I take vitamins once per day and prescription medication twice a day. This yearly log has two boxes for each day which I color in when I take my medication. I've gone 22 days without missing a single medication or vitamin, and my doctor was flabbergasted when I told him how consistent I had been!
  3. Sleep tracker: As I discussed in my last post, I'd like to wake up earlier. This monthly tracker helps me see when I sleep, so that I can remind myself to get to bed earlier.
  4. "Be a Better Partner" log: this is going to sound weird, guys, but I have a log of every argument I have with my boyfriend, as well as the takeaways. I do this not only to make sure that I'm working on the things I need to work on, but also to remind me when I get discouraged that there is a lesson to be learned from every argument (and also, that we don't fight as often as I think we do, which is important to stay positive).
  5. Emotion tracker: I want to be happier in 2019 (who doesn't?). I keep this page to track my mood throughout the day: morning, noon, evening, bed, and average. It's nice to be reminded that I'm pretty calm and happy most of the time, and that when I'm really upset, it's usually gone within a few hours.
  6. Talk Less/Listen More: In keeping with everything I've discussed, this is just a monthly tracker with a self-assessment of how often I talk (a red bar) and how often I listen (a green bar) which I complete at the end of each day.
  7. Symptom Tracking: I suffer from a couple of mental health conditions and sometimes, I start thinking that I'm much "crazier" than I am. I use this page, with an "AM/PM" box for each day of the year, to color in whether I had symptoms that day. So far, I am encouraged to see that I suffer from symptoms way less often than I thought I did. I've also been able to share this with my doctor.
  8. Beauty routine trackers: I won't go into these, because if I do, the patriarchy wins.
Fitness:
  1. Days in the Gym: this annual tracker has a calendar with each month ("at a glance" style). I color in the box around each day that I'm in the gym, so that I can gradually, and realistically, work my way up to my goal frequency.
  2. Workout Log: this strength-training log tracks, for each strength training exercise I do, the weight and total number of repetitions I complete. It's very motivating to see, on paper, that I am getting stronger and stronger every time I go to the gym. I also keep track of how much cardio I do as well.
  3. Step tracker: I've seen these done a lot of ways, but the way I do it is to just have a "progress bar" between zero and 10,000 steps. I use my phone pedometer to complete each day of this monthly spread.
  4. Days walked to work: I live within walking distance to my job, so for the days I walk that mile, I check a box.
  5. Dog walking tracker: I have to admit that I have been TERRIBLE about keeping up with this. I have a list of every week in 2019, plus five boxes next to it. The idea is to color one box per dog walk, and to eventually walk the dog at least five days a week.
Nutrition:
  1. Water tracker: I try to drink plenty of water, and usually I'm pretty good about it. However, from time to time, I'll find myself very hungry - and usually that it's because I'm dehydrated. This tracker has a blank date as well as check boxes for up to 128 ounces of water (8 ounces per box). I don't have the dates pre-filled since I don't do this every day.
  2. Alcohol tracker: I'm trying to drink less in 2019, simply because I am trying to be healthier all around. This annual tracker has a color key for number of drinks consumed, from zero to 3 or more, and a corresponding color (blue = 0, green = 1, yellow = 2, red = 3+). A side benefit of this tracker is that I can show my health care provider, at a glance, how often I drink alcohol.
  3. Sweets tracker: Again, as part of my commitment to living a healthier 2019, this is a yearly tracker where I fill in a box each day I go without eating "empty calorie" sweets. I have a list of reasons why on the right side of the page. I don't count sweets that have "other" nutritional value, such as fruit or granola. This has motivated me to make consistently healthier choices so far.
  4. Soda tracker: Same as above, only with soda. So far I've gone 28 days soda-free with one "accidental" exception (I drank a diet soda which I had not ordered at a restaurant but didn't want to send back).
  5. Food log: I keep a log of each food, when I consume it, and how much I eat, throughout the day. I also track this using an app on my phone. Tracking food intake is a really good way to lose, maintain, or gain weight, depending on your goals. I'd caution against anyone who suffers from an eating disorder to do this without first consulting with a medical professional or nutritionist, though.
  6. Calorie log: I keep a "progress bar" of calories I consume each day, with a minimum and a maximum which I try to stay between. I'll add the same caveat as above.
  7. Weight tracker: I listed each Sunday throughout the year and record my weight weekly in the box next to it. I also have a box to track whether that has gone up or down.
  8. Body measurements: as part of the motivation to get into the gym, I keep track of changes in my body here, including not just the usual "bust-waist-hip" measurements, but also calves, thighs, and upper arms. Numbers never lie!
Motivation and Inspiration:
Here is kind of a "mashup" of other things I use to keep moving forward. Some examples of pages I keep in this section are lists of inspirational quotes (with regard to self-worth, healthy eating, fitness, etc.), doodle practice, layout ideas (such as blank trackers), recipes and meal ideas, and lettering practice. I'm hoping at some point to add "one line per day" pages so that I can keep track of happy memories and notable events throughout the year.

At the end of each tracker period (week or month), I'll move over my pages to a backup binder (where I also keep spare paper for new spreads), where I will eventually add cover pages.  At the end of the year, I'll bind them all together for storage.

Tuesday, January 29, 2019

Introductory Concepts

In this post, I'm going to explain for absolute beginners what I mean by journaling what what I intend to accomplish, not only in this blog, but also why it is that I have a passion for journaling. I'll share with you what has worked for me as well as what hasn't, so you have some ideas to consider yourself.

First of all, I want to differentiate "bullet journaling" from my particular brand of journaling. Bullet Journaling is a concept discussed by Ryder Carroll in his book of the same name. I've never read his book - although I want to - and I only have a passing familiarity with the concepts he describes. However, I have found through my own forays into social media, like Instagram, Pinterest, and Facebook - that the concept of "bullet journaling" has taken on a life of its own. There are countless social media posts tagged #bujo and #bulletjournal as well as blogs and Etsy shops that actually have nothing to do with Carroll's concepts, though they have adopted his terminology.

To be clear, I don't take exception with this. In much the same way that Americans use specific trademarks as umbrella terms, this is quite common. For example, many people throughout the American south use the word "Coke" to refer to any soft drink. From what I understand, this is a common linguistic phenomenon.

That said, much of what I do falls squarely into what many on the Internet would call "bullet journaling": habit tracking, behavioral logging, inspiration, motivation, planning, and artistic expression. Again, what works for me is different than what I find working for many people; I don't use a lot of art, just the occasional doodle or maybe a geometric design I can replicate with a protractor, compass, or ruler. I don't add washi tape, stamps, or other aesthetic accents. As a full-time professional, I simply don't have the time to devote to these skills, and I don't have the desire nor the income to invest in the highest quality supplies (hence the whole concept behind this blog).

I encourage you to take everything I discuss with a grain of salt. What works for me may not work for you; consider it as a starting point. I do know - from both personal experience and from a psychological standpoint - that journaling is highly effective in understanding and modifying human behavior! In other words - habit tracking WORKS, whether you are trying to break habits, start new ones, or simply understand things about yourself. This is because the following phenomena are well documented with empirical evidence:

  • Human memory is highly fallible
  • Writing tasks down improves the likelihood that a person will do them, because again - see above.
  • The best way to achieve goals is not only to set them, but to make them specific, measurable, and attainable.
How does this correlate to journaling? Well, several ways. First, we can't change behavior, whether that's how we eat, sleep, keep hours, or work, without first understanding what it is that we want to change. And the easiest way to understand that behavior, considering that the human brain is likely to "revise" our memory, is to track the behavior in real time

For example, if I want to start waking up "earlier", I don't start by setting my alarm earlier; if it were that easy, I would already be doing it! I need to first identify why this is hard for me. The most obvious solution is that my sleep habits need to change, primarily in that I need to start getting more sleep. The way I do this through a journal is to track when I go to sleep and when I wake up each morning (which I do before lunch the next day - I don't track the night-of because it would probably be aspirational, and therefore, inaccurate).

Over the course of a couple of weeks, I notice that I am waking up pretty consistently about 8-9 hours after I go to bed, even on weekends. I also notice that I am going to bed pretty consistently - even on weeknights - much later than I should, in order to be able to realistically expect myself to wake up early.

Now that I have an idea of what habit I want to change, I'm going to set a specific, measurable goal: wake up by 6 AM. I know, based on the review I've conducted of my existing behavior/habits, that I'm going to have to go to bed by 9 or 10 PM in order to do this. So I'll start going to bed earlier, and more consistently, each night, until I reach my goal.

There is no way to convey the feeling I get - how incredibly motivated I am to keep going and how proud of myself I feel - when I color in my tracker boxes and know that I am staring my own personal success right there on the page. It's far more inspiring to continue your success than to be fearful that you will fail.

This is what sleep tracking is all about, although it can apply to anything: losing weight (probably the most common thing I see), drinking more water, taking medications, improving your mental health, socializing more regularly, being more grateful, reading more, cleaning more, saving more money... the list goes on.

And again - the reason that this works is based on scientific evidence!

So in order to get started, think about your day-to-day life and what makes you happiest and what you are dissatisfied about and would like to change. The idea is to continue forward momentum on the good things and begin tackling those challenges, one little bite at a time.

Over the next few posts, I will share with you how I have set up my own journal, step-by-step, and how I have set up my professional journal. The idea is for those of us who learn by example to have a starting point to consider when setting up a journal.

Wednesday, January 23, 2019

Resources for Budget Journaling Supplies

Let's get to it! I'm going to give you a quick rundown of supplies and places to get what you need in order to start a journal. In order to make this as efficient as possible, I'm going to break this down into budgets of $10 or less, $25 or less, and $50+, so you can stop reading when you've reached what you want to spend.

Basic Principles to Keep in Mind
Remember to be creative when it comes to "finding" supplies: how often do we find treasures in the clearance aisle, the thrift store, in our own storage, or in the stashes of a crafty friend? In fact, if you have a friend who journals, collects books, or is artistic in any way, use this person as a resource!

Most of us crafty-minded people (including me), including creative types, tend toward "collection." Maybe I'm just speaking from personal experience, but I have a stash of crafting supplies that I guard like a dragon's hoard! I've gotten better over the years about adding to it except as needed, but I still keep extras of many items. And this goes for more than just supplies: I also tend to collect patterns, websites, and Pinterest pages.

If you're interested in journaling because of a friend, ask if you can have any extra supplies he or she has on hand (thanks a lot, Marie Kondo)! Most of us are more than happy to share our stuff, primarily because we're constantly looking to de-stash (and re-stash, if we are being honest), but also - more importantly - because we love sharing our hobbies. Even if your friend doesn't have supplies to spare (THANKS A LOT, MARIE KONDO), he or she may have a veritable treasure trove of inspirational websites or Pinterest suggestions. This goes not only for "IRL" friends, but also the online community as well.

Another option is to sort through your own "stash." For my primary personal bujo, I found the supplies in old boxes I had never unpacked from several moves. I use an old DayTimer 7-ring half-letter planner binder (8.5 x 5.5", very close to A5 size) that I purchased years ago. It's still in great shape... probably because I never used it. I also found a smaller 6-ring binder that I'll use in case I lose or damage my DayTimer binder. I have really enjoyed the binders starting out because I wasn't sure what all I wanted to do, and I can add and remove pages as I draft and re-draft them.

Comparison is the Thief of Joy
I keep going back to Pinterest, because along with Instagram, it's a great resource for ideas. You may even have come here from a pin! I highly recommend that you search Pinterest if you're looking for inspiration, and start collecting pins on a dedicated board. One downside, and part of the reason I had the idea for this blog, is that you'll often have to wade through ads or blogs so full of affiliate links and sales pitches as to make many of these resources helpful as a visual guide only. Start your search with "bullet journal" and add whatever interests you after ("layouts," "spreads," and "ideas" are good general search terms if you're not looking for anything specific). 

This is the other caveat to using social media, not only for crafting inspiration, but for life in general, is to be very conscientious not to compare yourself to anyone else. It's so easy to fall into the trap of not feeling like you should "even bother" because much of what you will find is what I'd again refer to as "curated reality." You're seeing the best-of-the-best, hand-picked by the best-of-the-best! Not to discount the hard work, skill, and talent that goes into those posts, but it's perfectly fine if you don't want to display your work and if your bullet journal isn't beautiful and artistic and perfect.

So my motto when it comes to social media is this: admire the work of others without discounting your own. Your work is no less valuable or important or meaningful simply because it is less than what you personally think is "perfect." Besides, much of what you see online is the result of years of practice.

What can I do with a $10 budget?
At the very minimum, you need just two things to start journaling: something to write on and something to write with. It's really that simple.

If you really do have a barebones, minimal budget, there's no reason you can't start with a plain spiral-bound notebook or even a $1.00 composition book and a pen or pencil that you like.

If you have $10 to spare, the best place to start is the clearance aisle of your local Target, Walmart, or office supply store. I have found really cute 3-ring A5 binders for $1.50 on the clearance rack of an Office Depot near my house! A5/half letter is a great size for both portability and convenience, since you can just cut printer paper (or cardstock) in half. If you intend to use pre-made printable pages (like the ones on this site), this is a really great option for you.

If you prefer a more traditional approach to bullet journaling, consider using a dot-grid journal. Most commonly available in 5mm grids, pages are printed much like graph paper, but instead of there being lines that form squares, there are dots printed at 5mm intervals to form a less obtrusive grid. Plenty of online stores, most notably Amazon, have options available to consider. Brick-and-mortar stores I have had luck with are Half-Price Books (where I got my light blue work Piccadilly journal for $6) and Hobby Lobby (where you can get a Fabriano dot-grid notebook for $6 [A5 size] or $10 [letter size] - be sure to use the online coupon for 40% off).

My HPB Piccadilly journal has a nice, substantial cover with an inner pocket, pre-printed key and index, and elastic strap, but it was only available in blue and pink, and the pages are pretty thin.  My Fabriano notebook from Hobby Lobby has much thicker paper, but the cover is just heavy cardstock and there is no inside pocket, index, or key. The pages are glued, so I'm going to have to come up with a long-term binding fix as well. Decide for yourself how much work you want to put into customizing your journal and then it's easier to pick which is best for you.

I'm assuming you already have pens, pencils, and a ruler around, but for about $3, you can pick up a compass and expand your options. If you're using a binder, though, and don't have a hole punch, you'll need to pick one up for about $2. A good quality eraser is helpful if you intend to sketch, doodle, or plan your layouts in pencil prior to inking them in. My favorite is a Prismacolor eraser I got at the craft store; the white erasers tend to work better for me in terms of erasing completely and not leaving smudges. If you go with a regular pink eraser, be sure that it is still soft and pliable, because as they get old and dry out, I have found that smudging can become a serious problem.

What can I do with a $25 budget?
I'm assuming that you've spent about $10 on a compass or hole punch and a journal, and that you have a ruler and basic pens/pencils, so now what?

Well, I think the most important thing to consider is what you find most important. If you are creative and artistic, the best way to spend money is probably on a good set of pens, markers, or pencils. My favorite pens for journaling are Pilot V5; I love the very fine tip and quick-drying ink, although they cost a bit more. The most economical way to buy pens is in sets, either at the craft store with a coupon, or online.

Other pens I have tried and recommend are: LePen (I got a set of 10 for just over $10 at Hobby Lobby, with a 40% coupon applied); Office Depot Foray pens (I prefer the capped version as opposed to retractable; a set of a dozen is $14); PaperMate Flair (available in both fine and medium, and in various combinations of colors ranging from a 4-pack for $8 to a 24-pack for $20); and ultra-fine Sharpie markers ($7 for a 12 pack of black only on Amazon). If you only need black, Sakura Pigma Microns are great (but you'll pay about $3 per pen; they come in sets as well).

Consider the type of paper you intend to use before you invest in pens, because "bleeding" or "ghosting" on many types of paper can be an issue (this refers to being able to see ink from the other side of the page). Pens I'd recommend, but outside this budget range, are Staedtler Triplus Fineliner (which you might be able to pick up, with a coupon, at the craft store), Zebra Mildliners (if you like double-ended pens, which I don't, so I haven't used these), or Stabilo 88 fineliners (which I've never used).

Whatever you do, don't bother spending money on store brands at craft stores. I don't know about online, but I've never had good luck with "off-brand" pens. I'd rather have spent the money on a couple of really high-quality pens than a set with a bunch of colors that I end up tossing or giving away.

If fancy pens aren't your thing, a good way to invest is in good, thick paper. I like thin cardstock since I never have to worry about ghosting. In fact, the way I got started was to print dot grids onto cardstock, cut it in half, and hole-punch the pages. Craft stores are probably your best bet for this, because I see their scrapbooking supplies go on sale very frequently. Avoid buying "heavy" cardstock and just buy whatever color you like. Heavy cardstock just isn't necessary, will be too thick in your notebook, and comes in limited colors.

If you're fine with regular paper (or have a bound journal) and are set on the pens front, a few other items you might find useful are: a "math" set, including a protractor and compass (about $10); a corner rounder (which is like a hole punch - except you insert the corner of the page along the guidelines, press down, and it rounds the corner of the paper; mine was $10 on Amazon); a "circle maker" to draw smaller circles than most compasses will permit (Helix makes one which is sold on Amazon for just over $5); or consider stamps, stickers, or washi tape (not my thing).

What can I do with a $50 budget?
I'm assuming that at this point, you've decided from the above lists what you'll focus your budget on. A few more options are just to invest in a higher quality notebook (the Leuchtturm1917 is probably the most commonly-used journal; Scribbles that Matter also makes a journal I've considered myself) or a pen organizer (if you aren't interested in making your own, like the tutorial I hope to post someday).

If you find yourself in possession of a gift card to a craft store, though, be sure not to skip the scrapbooking aisle for all manner of supplies you can easily use for journaling!

Tuesday, January 22, 2019

Tutorial: Easy Sewn Journal Cover

Ready to get started? Me too!


As part of my “use what you have or can buy for cheap,” I’m going to show you today how I used basic sewing skills, fabric scraps, and a $6 dot-grid notebook to create a customized journal. You really don’t even need a sewing machine: with a needle and thread, you can take any plan journal and cover it to make it your own! This way, you don’t have to pay extra for a journal with a cover you like, so your options are a bit more varied - so you can pick up a journal based on what's around or what you already have.

I used the following supplies (items in italics are entirely optional):
  • Basic dot-grid notebook, purchased for $6 at my local used bookstore
  • Fabric scraps (not stretchy fabric unless you know how to sew with it) or a fat quarter of quilting fabric (you may need more if your journal is larger than A5)
  • Elastic, to make a strap to keep the journal closed or a pen loop
  • A piece of graph paper (to draw my pattern; any paper is fine)
  • Thread to match/contrast your fabric choice (all purpose thread is fine)
  • A sewing machine (or a hand-sewing needle)
  • A pen or pencil to mark your fabric, and to draw your pattern
  • A ruler or straight edge
  • Scissors (for both fabric and paper - separate pairs if you sew often)
  • Iron-on interfacing
  • A clothes iron with steam (very  helpful)
  • Straight pins (very helpful)
  • About an hour or two of your time
Let’s get started. 

First, draw your pattern. This is the most difficult part of the whole process, so if you get frustrated, take a deep breath and a break, but don’t be discouraged.

Basically, what we need to do is trace the outline of one side of the cover of the journal, then add in an allotment for the spine, then duplicate the other cover.  We will draw the pattern just a little more than flush so that the cover has just enough room to fit inside.

Lay the journal down right up against the corner of the pattern paper. Trace about 1-2mm away from the edge (more if the cover is very thick, less if the cover is like cardstock) around the edge of the journal (not the spine edge) and, if the journal has rounded corners, along those. This is why graph paper is helpful: you only need find the closest line to the straight edges, and use those as guides to cut (if needed), later on. My journal is an A5/half letter size, so a regular letter-sized piece of graph paper worked with minimal trimming.

Alternatively, you can trace around the three edges of the cover, roll the journal onto its spine (taking care not to let the book slip on the paper), then roll it to the other cover, and trace along the edges. Connect the lines where the spine was.

Now, keeping the edge of the paper still aligned with the edge of the journal cover, wrap the paper around the journal like a “journal taco” and mark where the cover ends on the other side. Set the journal aside. Match the mark you made to the other edge of the paper and fold the graph paper in half.

Trim the paper along the corner marks you drew, as well as along the top/bottom guides (if using graph paper, or, where you marked the edges, if not) so that it becomes an almost-exact replica of the journal cover, only it will be wider to accommodate the spine of the journal. Check the fit, like this:


Your journal should fit almost perfectly inside, but the paper should be just a tiny bit larger than the journal itself so there’s wiggle room to account for the thickness of the cover. If you make it too small, you won't be able to get it onto the journal; if you make it too large, the journal will slip around inside.


This is the completed pattern. Notice that my journal has an elastic strap, which I cut off. You can leave your on if you like, just know that it might create a lump once the cover is on. Plus, if you add one yourself, it won’t be needed any longer.

Now you'll trace the pattern onto your fabric. Ensure that you iron the fabric flat, if you can, to make the outline accurate. I used a fine-tip sharpie; you can use a pencil, ball-point pen, or a specialty fabric marker. Bear in mind that you'll use this line to stitch along later.


Once the pattern has been traced onto the fabric, mark along the straight edges 1/2" away from the lines. This will add in the seam allowance. Cut along these lines. I will now refer to this piece as the "outer journal cover."

If you intend to use interfacing, duplicate the pattern transfer onto the interfacing, cut, and fuse. DO NOT add seam allowances to the interfacing; when you fuse, the interfacing should fit neatly inside the stitching guide lines.

We will now cut two more pieces of fabric, which will fit inside the journal's covers. There are a couple of things you need to consider: if your fabric is directional, it needs to match up with the outside of the journal (more on this later); if your journal's spine does not bend very far backwards, you'll want the inner cover pieces not to come too close to the spine; and if you're using thick fabric for the outer journal cover, you may want to use thinner cotton, like broadcloth or calico, for the inner cover pieces (so your journal closes properly).

Since my journal has a very flexible spine, I wanted the inner cover pieces to almost fully enclose the manufactured cover. I took the pattern piece I used for the outer cover piece and folded it almost all the way to the spine, but with enough room to let the book cover fit inside:


Repeat the trace, mark seam allowance, and cut steps above. Again, if you're using interfacing, you'll want to trace this same pattern piece onto two pieces of interfacing and fuse it flush with the stitching lines.

All told, you should now have three pieces of fabric: an outer cover piece and two inner cover pieces. Ensure that everything fits one more time before you stitch.

If you are using elastic to make a closure strap, go ahead and cut it now. I cut mine to the height of the (closed) journal plus about half an inch, and it's a good, snug fit, without hanging off the back too loosely when the journal is open. Figure out which side of the journal you want this to come from, and pin it to the corresponding place on the inner or outer cover (it doesn't matter), like this:


Now, we need to hem the edges of the inner cover pieces that are closest to the book spine, because they will be visible. Turn this edge 1/2" to the wrong side and press.


While the iron is still on, you'll also want to press the outer cover where the spine will be. Matching the edges, and with right sides together, place the inner cover pieces on top of the outer cover pieces. There should be a gap, depending on how far in your inner cover pieces come, between the inner cover pieces. Make a 1/4" cut in the seam allowance on each side of the outer cover piece, right next to the folder inner cover piece edges. Use this notch to press the outer cover piece down 1/4", so that the raw edge should now meet at the stitching line:


Now to sew! Stitch along the folded edges of the inner cover pieces about 1/4" from the folded edge. Go slowly, because this stitching will be visible!


Everything is ready to assemble. Pin the inner cover pieces to the outer cover piece, right sides together. If you are using directional fabric (like mine - I don't want upside-down peacock feathers!) you'll want to make sure that everything faces the correct direction:


Pin like this, ensuring that - if you're adding the elastic strap - you catch the raw edges of the elastic with a pin to secure it in place as you sew:


Start stitching along one of the straight sides. Stitch carefully along the line you drew when you traced the fabric and/or where the edge of the interfacing sits. You may find it helpful to shorten your stitch length around the corners if they're rounded.

If you are hand stitching, the best stitch for this application is a backstitch with a stitch length of no more than 1/8 inch.  Use strong thread or double it up.

If you're sewing in the elastic strap, backstitch a couple of times just to reinforce it.

You'll come to a part where you're stitching between the inner cover pieces; just keep stitching straight along (you will use this as a guide momentarily):


Almost done!

Lay everything out flat, remove all the pins, and if your journal has curved corners, cut notches into the seam allowances to help assist the cover in laying flat once turned right side out:


I do not trim the seam allowances, but you can if you like.

Turn the cover pieces right side out, like this:


Do your best to finagle the piece so that the new folds are pushed outward from the seam as much as possible.  Press if desired.

One last thing before we put this on the journal. You see in the image above that the 1/4" folds we pressed earlier are now folded down double, and if you've done this right, the fabric should be folded along the same line of stitching that is now visible:


Very carefully edge stitch (or hand-stitch) these folds in place. Ensure that you do not "catch" either of the inner cover pieces when you do so.


If you happen to catch these folds (like I did), simply pull out the stitch that is caught with a seam ripper.

All that is left is to put your journal - very carefully - inside! I had to put the edge of one cover inside the pocket, then pull the cover almost all the way back, put the other edge into the other pocket, and very gently push the journal in and pull the cover up until it was all flush and neat. Two things you'll want to consider when you're doing this are: 1) making sure a directional fabric is matched up (again, I don't want my peacock feathers upside down!) and 2) making sure that the cover either slides between the seam allowances, or the cover slides in on the side toward the outside journal cover - so that the seam allowance "bulk" is on the inside cover.  I wasn't able to get my journal "perfectly" between the seam allowances, but since I'm not using that many layers of fabric, you can't really tell.


These are the inner cover pockets, which I'm sure you could slip things inside if needed:


You can see how - with this basic tutorial - you can add additional elements, such as pen loops, embroidery, quilting, other closures (like a button and a piece of elastic, rather than the full-jacket elastic strap like mine), additional pockets on the inside, and whatever else you can think of. All you'd need is a little more time, creativity, and patience. Plus, if you get tired of the same cover (or if it gets dropped in the mud), you can make another instead of tossing your journal out or having to stare at it for the rest of the year.

Thanks for sticking with me! Please do not hesitate to comment below if you have any questions. I will do my best to help, especially if you have pictures to show me where you're having trouble. I would also be happy to consider any requests for tutorials to cover additional journal types (like spiral-bound), accessories, or cover options (which I'm hoping to try anyways).


Thursday, January 17, 2019

Welcome to Thrifty Journaling!

Hi there, and welcome!

I'm new to "bullet journaling," and I do it to improve my productivity and health, not as a creative outlet (for the most part) since, unfortunately, I'm not artistic. I'm trying to change this - part of my goal for 2019 is to branch out and try to learn new hobbies.

Here, you will find free dot-gridded printables, secular inspiration, non-judgmental encouragement, and basic advice on the methods I use to journal, primarily using supplies most of us already have or can purchase at low cost. I have nothing against religion in general, and I may occasionally break that rule, but you'll not see much reference to any specific religion or spiritual practice on this blog. You should also know that any time you want, you can comment on any post with questions - or email me if you prefer that your question remain anonymous - and I'll do my best to answer openly, honestly, and without treating you like you're "too new" or asking something that shouldn't be asked! I'm new to the hobby too, so if it's something I don't know, maybe we can figure it out together! I feel like journaling is an incredibly effective way to motivate yourself, and I think that's backed up by scientific research. It seems to me like viewing my success is much more of a motivation than avoiding my failures.

What you won't find are ads, affiliate links, beautiful artwork (sorry!), religious themes, long-winded descriptions of how amazing and perfect my life is, or a curated reality. I aim to be practical and accessible, not pretentious and unrealistic. I know that a lot of times, I see Instagram accounts and blogs that make me feel, "why should I even try? I'll never be that good!" I don't want to be one of those blogs. I think this hobby should be freely available for everyone, especially for those of us who have - at best - good handwriting, the ability to use a ruler, and, at the very least, the desire to create something. What I mean by "curated reality" is that sometimes, it's hard to remember how many outtakes there are for those Pinterest-perfect Instagram-ready pictures, how heavily edited they are, how we are shown exactly what they want us to see -- so much so, that there can be this constant feeling of "not good enough." I don't meant to downplay how much hard work goes into that, but I hope you'll never feel that you're "not enough" here.

In the coming days, I'll introduce myself and show you some of the methods I've used (with varying degrees of success) to create my own journal and planner. I have a personal journal and a work planner to hopefully stay a little more organized and productive in 2019 (*she says, as she writes a personal blog post from her desk at work*). I hope you'll stick around, maybe subscribe to my blog if you like, even download a PDF or two to incorporate in your own personal journal or planner or to use as a starting point for your own ideas. Anyways, welcome, and thanks for reading!