

As part of my “use what you have or can buy for cheap,” I’m going to show you today how I used basic sewing skills, fabric scraps, and a $6 dot-grid notebook to create a customized journal. You really don’t even need a sewing machine: with a needle and thread, you can take any plan journal and cover it to make it your own! This way, you don’t have to pay extra for a journal with a cover you like, so your options are a bit more varied - so you can pick up a journal based on what's around or what you already have.
I used the following supplies (items in italics are entirely optional):
- Basic dot-grid notebook, purchased for $6 at my local used bookstore
- Fabric scraps (not stretchy fabric unless you know how to sew with it) or a fat quarter of quilting fabric (you may need more if your journal is larger than A5)
- Elastic, to make a strap to keep the journal closed or a pen loop
- A piece of graph paper (to draw my pattern; any paper is fine)
- Thread to match/contrast your fabric choice (all purpose thread is fine)
- A sewing machine (or a hand-sewing needle)
- A pen or pencil to mark your fabric, and to draw your pattern
- A ruler or straight edge
- Scissors (for both fabric and paper - separate pairs if you sew often)
- Iron-on interfacing
- A clothes iron with steam (very helpful)
- Straight pins (very helpful)
- About an hour or two of your time
Let’s get started.
First, draw your pattern. This is the most difficult part of the whole process, so if you get frustrated, take a deep breath and a break, but don’t be discouraged.
Basically, what we need to do is trace the outline of one side of the cover of the journal, then add in an allotment for the spine, then duplicate the other cover. We will draw the pattern just a little more than flush so that the cover has just enough room to fit inside.
Lay the journal down right up against the corner of the pattern paper. Trace about 1-2mm away from the edge (more if the cover is very thick, less if the cover is like cardstock) around the edge of the journal (not the spine edge) and, if the journal has rounded corners, along those. This is why graph paper is helpful: you only need find the closest line to the straight edges, and use those as guides to cut (if needed), later on. My journal is an A5/half letter size, so a regular letter-sized piece of graph paper worked with minimal trimming.
Alternatively, you can trace around the three edges of the cover, roll the journal onto its spine (taking care not to let the book slip on the paper), then roll it to the other cover, and trace along the edges. Connect the lines where the spine was.
Now, keeping the edge of the paper still aligned with the edge of the journal cover, wrap the paper around the journal like a “journal taco” and mark where the cover ends on the other side. Set the journal aside. Match the mark you made to the other edge of the paper and fold the graph paper in half.
Trim the paper along the corner marks you drew, as well as along the top/bottom guides (if using graph paper, or, where you marked the edges, if not) so that it becomes an almost-exact replica of the journal cover, only it will be wider to accommodate the spine of the journal. Check the fit, like this:

Your journal should fit almost perfectly inside, but the paper should be just a tiny bit larger than the journal itself so there’s wiggle room to account for the thickness of the cover. If you make it too small, you won't be able to get it onto the journal; if you make it too large, the journal will slip around inside.

This is the completed pattern. Notice that my journal has an elastic strap, which I cut off. You can leave your on if you like, just know that it might create a lump once the cover is on. Plus, if you add one yourself, it won’t be needed any longer.
Now you'll trace the pattern onto your fabric. Ensure that you iron the fabric flat, if you can, to make the outline accurate. I used a fine-tip sharpie; you can use a pencil, ball-point pen, or a specialty fabric marker. Bear in mind that you'll use this line to stitch along later.

Once the pattern has been traced onto the fabric, mark along the straight edges 1/2" away from the lines. This will add in the seam allowance. Cut along these lines. I will now refer to this piece as the "outer journal cover."
If you intend to use interfacing, duplicate the pattern transfer onto the interfacing, cut, and fuse. DO NOT add seam allowances to the interfacing; when you fuse, the interfacing should fit neatly inside the stitching guide lines.
We will now cut two more pieces of fabric, which will fit inside the journal's covers. There are a couple of things you need to consider: if your fabric is directional, it needs to match up with the outside of the journal (more on this later); if your journal's spine does not bend very far backwards, you'll want the inner cover pieces not to come too close to the spine; and if you're using thick fabric for the outer journal cover, you may want to use thinner cotton, like broadcloth or calico, for the inner cover pieces (so your journal closes properly).
Since my journal has a very flexible spine, I wanted the inner cover pieces to almost fully enclose the manufactured cover. I took the pattern piece I used for the outer cover piece and folded it almost all the way to the spine, but with enough room to let the book cover fit inside:

Repeat the trace, mark seam allowance, and cut steps above. Again, if you're using interfacing, you'll want to trace this same pattern piece onto two pieces of interfacing and fuse it flush with the stitching lines.
All told, you should now have three pieces of fabric: an outer cover piece and two inner cover pieces. Ensure that everything fits one more time before you stitch.
If you are using elastic to make a closure strap, go ahead and cut it now. I cut mine to the height of the (closed) journal plus about half an inch, and it's a good, snug fit, without hanging off the back too loosely when the journal is open. Figure out which side of the journal you want this to come from, and pin it to the corresponding place on the inner or outer cover (it doesn't matter), like this:

Now, we need to hem the edges of the inner cover pieces that are closest to the book spine, because they will be visible. Turn this edge 1/2" to the wrong side and press.

While the iron is still on, you'll also want to press the outer cover where the spine will be. Matching the edges, and with right sides together, place the inner cover pieces on top of the outer cover pieces. There should be a gap, depending on how far in your inner cover pieces come, between the inner cover pieces. Make a 1/4" cut in the seam allowance on each side of the outer cover piece, right next to the folder inner cover piece edges. Use this notch to press the outer cover piece down 1/4", so that the raw edge should now meet at the stitching line:
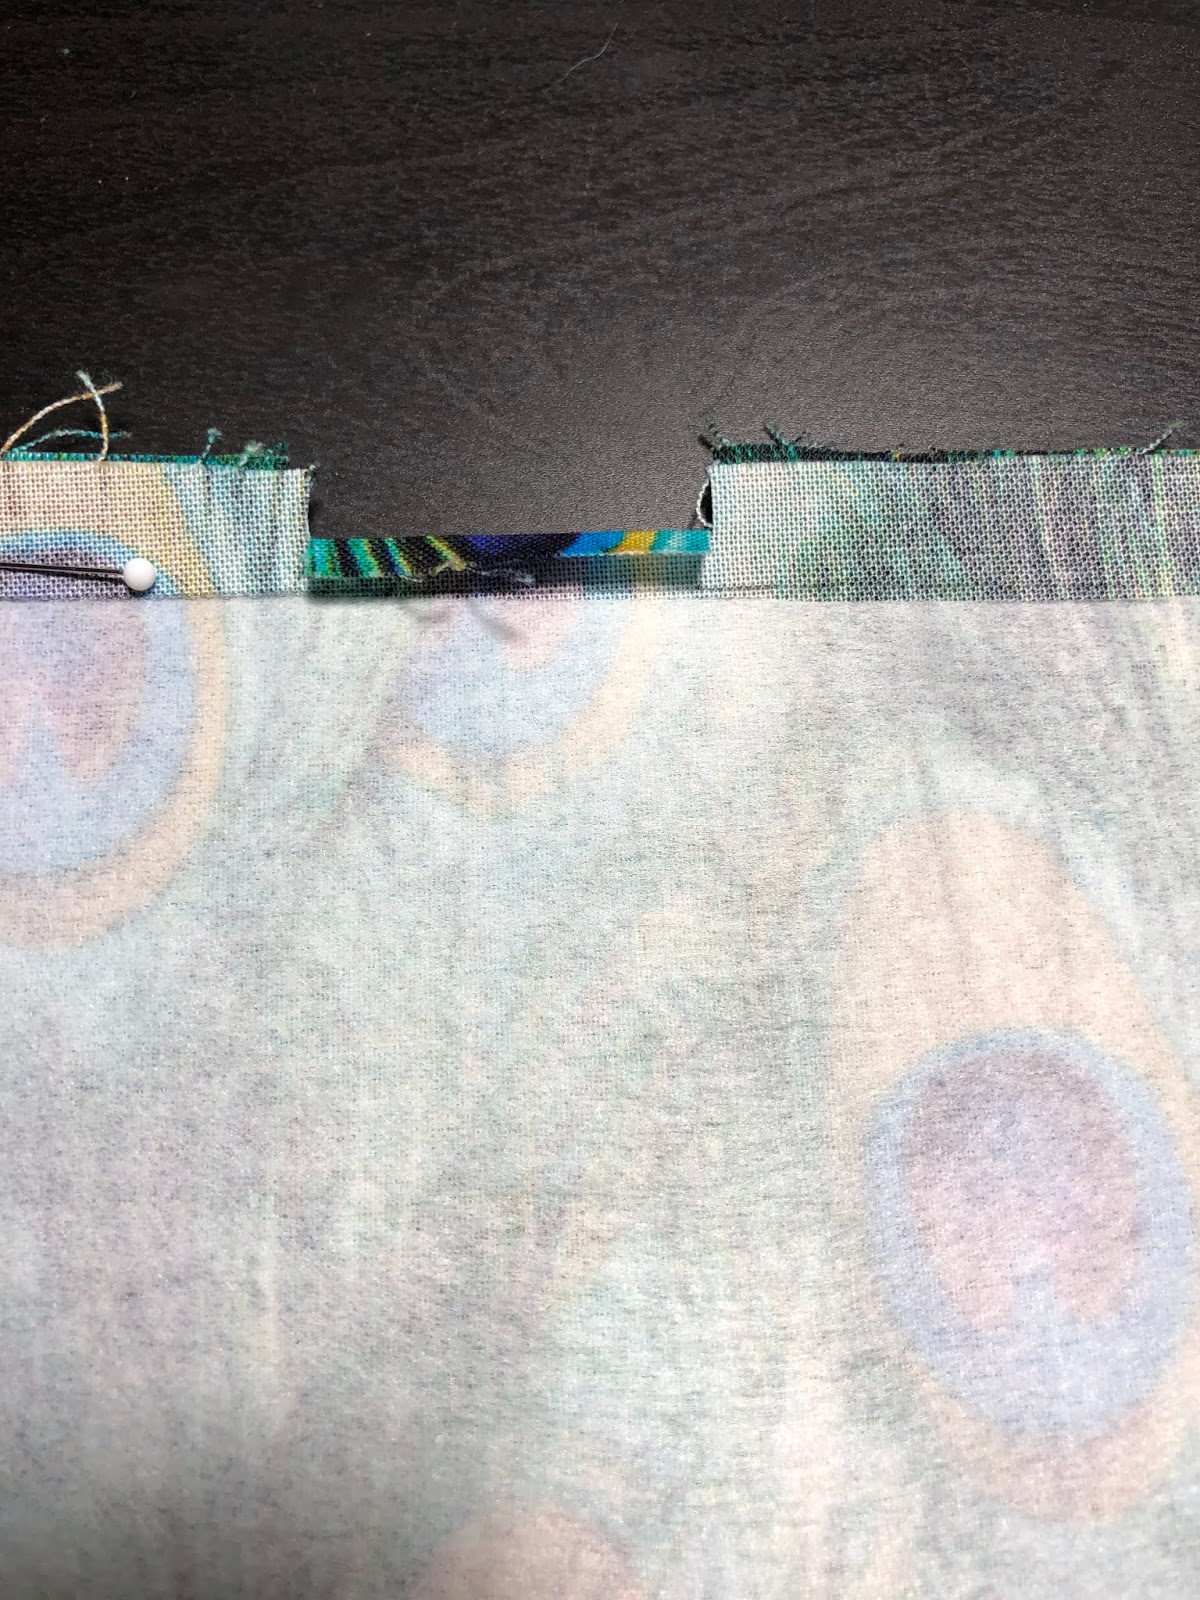
Now to sew! Stitch along the folded edges of the inner cover pieces about 1/4" from the folded edge. Go slowly, because this stitching will be visible!

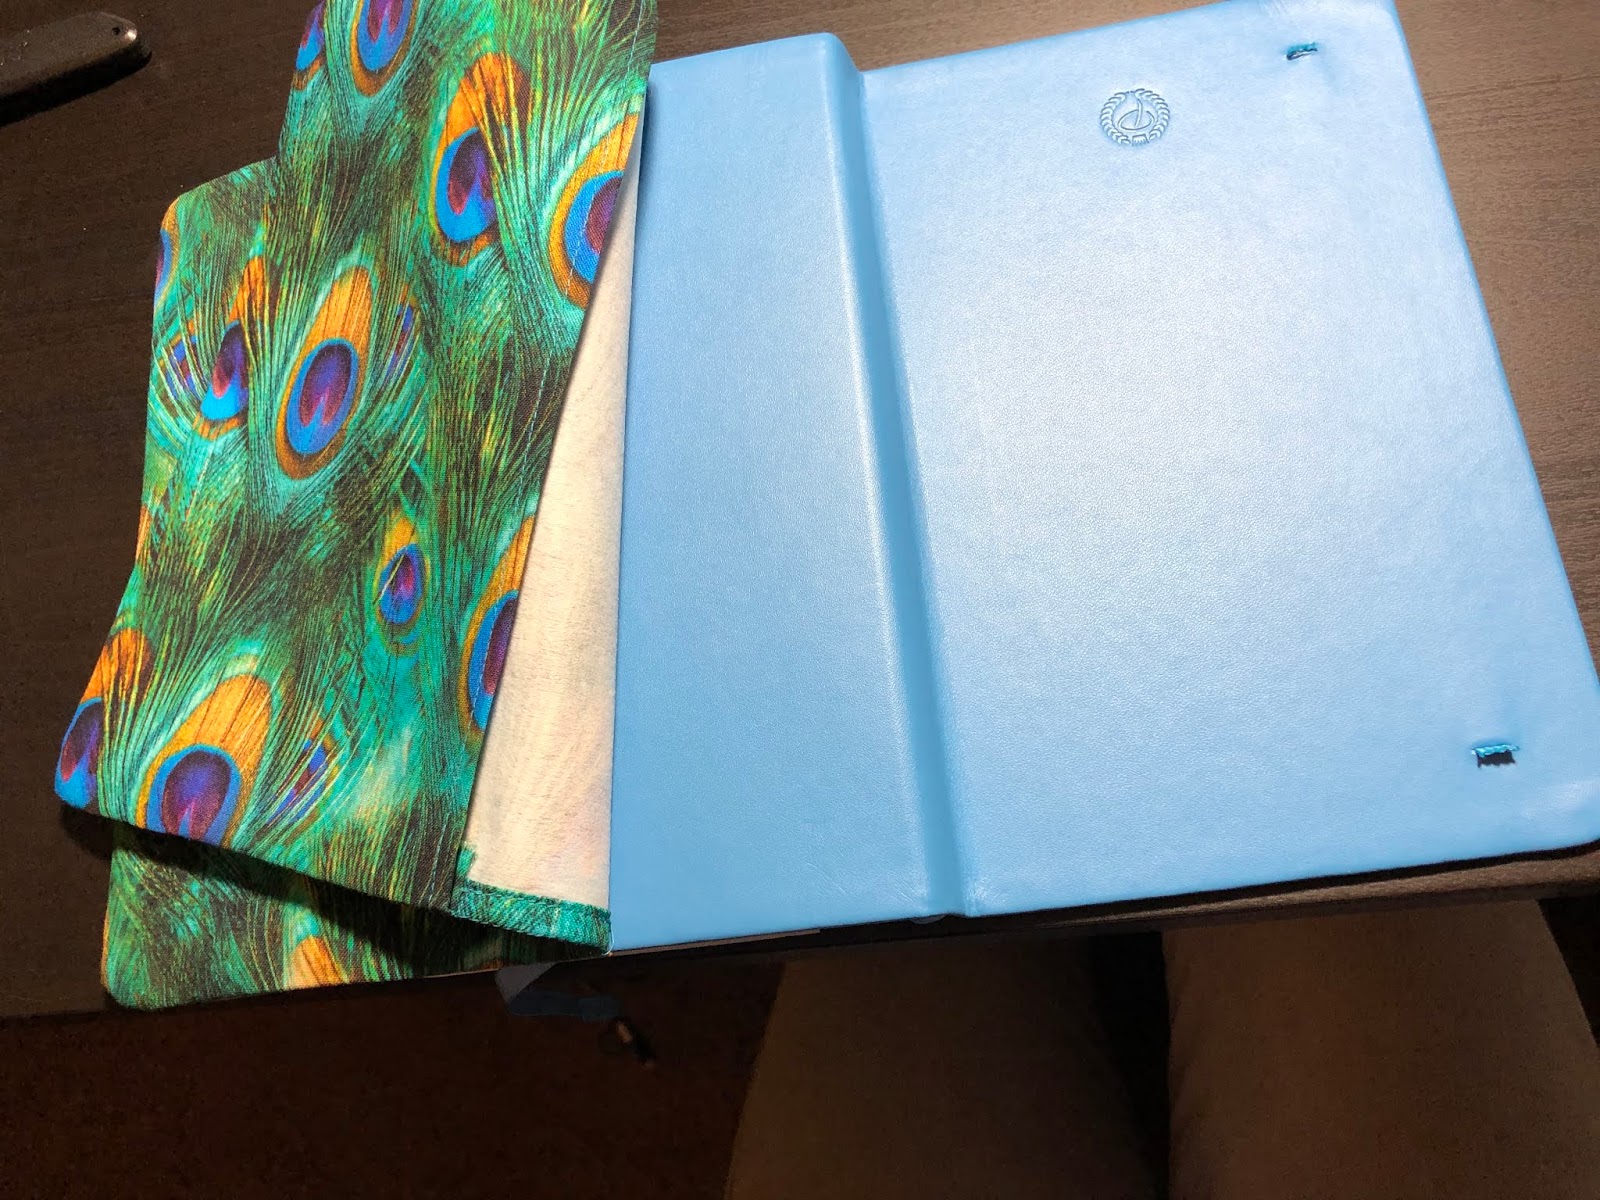
Everything is ready to assemble. Pin the inner cover pieces to the outer cover piece, right sides together. If you are using directional fabric (like mine - I don't want upside-down peacock feathers!) you'll want to make sure that everything faces the correct direction:

Pin like this, ensuring that - if you're adding the elastic strap - you catch the raw edges of the elastic with a pin to secure it in place as you sew:

Start stitching along one of the straight sides. Stitch carefully along the line you drew when you traced the fabric and/or where the edge of the interfacing sits. You may find it helpful to shorten your stitch length around the corners if they're rounded.
If you are hand stitching, the best stitch for this application is a backstitch with a stitch length of no more than 1/8 inch. Use strong thread or double it up.
If you're sewing in the elastic strap, backstitch a couple of times just to reinforce it.
You'll come to a part where you're stitching between the inner cover pieces; just keep stitching straight along (you will use this as a guide momentarily):

Almost done!
Lay everything out flat, remove all the pins, and if your journal has curved corners, cut notches into the seam allowances to help assist the cover in laying flat once turned right side out:

I do not trim the seam allowances, but you can if you like.
Turn the cover pieces right side out, like this:

Do your best to finagle the piece so that the new folds are pushed outward from the seam as much as possible. Press if desired.
One last thing before we put this on the journal. You see in the image above that the 1/4" folds we pressed earlier are now folded down double, and if you've done this right, the fabric should be folded along the same line of stitching that is now visible:

Very carefully edge stitch (or hand-stitch) these folds in place. Ensure that you do not "catch" either of the inner cover pieces when you do so.

If you happen to catch these folds (like I did), simply pull out the stitch that is caught with a seam ripper.
All that is left is to put your journal - very carefully - inside! I had to put the edge of one cover inside the pocket, then pull the cover almost all the way back, put the other edge into the other pocket, and very gently push the journal in and pull the cover up until it was all flush and neat. Two things you'll want to consider when you're doing this are: 1) making sure a directional fabric is matched up (again, I don't want my peacock feathers upside down!) and 2) making sure that the cover either slides between the seam allowances, or the cover slides in on the side toward the outside journal cover - so that the seam allowance "bulk" is on the inside cover. I wasn't able to get my journal "perfectly" between the seam allowances, but since I'm not using that many layers of fabric, you can't really tell.
These are the inner cover pockets, which I'm sure you could slip things inside if needed:

You can see how - with this basic tutorial - you can add additional elements, such as pen loops, embroidery, quilting, other closures (like a button and a piece of elastic, rather than the full-jacket elastic strap like mine), additional pockets on the inside, and whatever else you can think of. All you'd need is a little more time, creativity, and patience. Plus, if you get tired of the same cover (or if it gets dropped in the mud), you can make another instead of tossing your journal out or having to stare at it for the rest of the year.
Thanks for sticking with me! Please do not hesitate to comment below if you have any questions. I will do my best to help, especially if you have pictures to show me where you're having trouble. I would also be happy to consider any requests for tutorials to cover additional journal types (like spiral-bound), accessories, or cover options (which I'm hoping to try anyways).
No comments:
Post a Comment